Great Waterfall Pictures...
and their SECRETS
Everyone who loves waterfall photos dreams of taking their own fabulous waterfall pictures.
Well, you're in luck. I'm here to give you some easy-to-use tips for improving your waterfall photos.
Let me start by saying anyone can do it!
I really, really believe that.
What do the pros have going for them? Besides several thousand dollars in equipment, the main advantage pros have in nature photography is
- experience, and
- time
Both of these issues can be overcome by you!
Are you ready? Let's dig in.
1. Use a Tripod
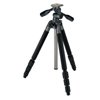
I can't emphasize this enough. You need a tripod. Badly. Without a doubt. No question about it. Just do it. A tripod will have the greatest impact on improving your waterfall pictures.
Let me show you why. Click on the tripod picture.
Yes, click on the link above and then return here.
Have I sold you on the value of a tripod? You didn't skip the link did you? Yes, go back and read it or you'll be missing out. Hey, it's free!
Yes, I know tripods can be a little cumbersome. But let's get real here. Do you think you can snap your fingers and great waterfall pictures will appear? Nope, sorry. You're dreaming again.
Let me give you some good news, though.
Carrying a tripod is the hardest part of getting incredible waterfall photos.
Now that wasn't so bad, was it?
2. Use a polarizing filter
This is easy. A polarizer costs about $40 for an average quality filter. Don't go cheap here as a good polarizer will last as long as your lens and camera body. Any landscape picture will benefit from a polarizer but in the case of waterfall pictures, the effect is magnified because of the water.

What does a polarizer do? In simple terms, a polarizing filter reduces or eliminates unwanted reflections, whether it be on water or rocks or even leaves. It also enhances the color of the sky - essentially making the blues deeper and more vibrant.
Again, I've built a separate page that shows the effects of a polarizer on waterfall pictures along with more details on how it works.
Just click the filter picture.
3. Avoid the sun
Shoot early or shoot late or pray for bad weather.
Any questions?
Ok, Ok, I'll explain it. Chill out.
Light is a funny thing and it does funny things early and late in the day. The low angle of the light at sunrise and sunset causes the light to pass through more of the Earth's atmosphere. Without any more technical jargon, let's just say this causes better lighting conditions. And, well, it does.
The one hour window is great, and two hours after or before sunrise/sunset are still ok, especially for waterfall pictures which are often located in steep terrain and dense foliage.
So what's with the bad weather comment?
It's simple. Direct sunlight is bad for waterfall pictures. Overcast days provide more even lighting and help to reduce the contrast in your photos. With waterfalls especially there is excessive contrast between the waterfall and its surroundings. And if there is direct sunlight hitting the water it is practically impossible to get an evenly exposed picture. Either the waterfall will be overexposed or the surrounding rocks and foliage will be underexposed. The solution?
Shoot early or shoot late or pray for bad weather.
One other solution is to do some post-processing with photo editing software such as Photoshop. I'm working on some Photoshop tips to help you. Stay tuned.
Now, a few other conditions, caveats, and fine print.
Since waterfalls are often located in hilly or mountainous areas, good lighting is often available well past "normal" shooting times for nature photographers because the waterfall and surroundings are naturally shaded. For instance, a waterfall that is facing west and that is at the base of a mountain in the Smokies could be shaded for as long as 4-6 hrs. Exactly because of this I have included on each waterfall page the direction that they face. Use this information as a loose guideline in determining whether to visit in the morning or evening.
4. Bracket, Bracket, Bracket
Shoot a bunch of waterfall pictures. I mean a bunch.
Bracketing in photography has to do with hedging your bets, if you will. Trust your autoexposure meter, but verify. Especially with waterfalls, the meter can be fooled. It will tend to underexpose the water. The solution is to bracket the exposure. All digital SLRs now allow you to automatically bracket pictures based on settings you give it. Read your manual to find out how to do this.
You can also switch your camera to manual mode and bracket manually if all else fails or if you own an inexpensive camera. Been there. Done that.
Just take the first picture on auto and note the shutter speed and f-stop used. Switch it to manual. Using the same f-stop, take a couple of pictures at slightly longer shutter speeds and a couple at slightly shorter shutter speeds. See, you ARE as smart as a computer!
What do the pros do? They take a ton of pictures! To a large extent it's a numbers game. They expect roughly one quality picture out of every 24 shots (from the old days of film). Yes, the pros tend to have a higher percentage of good shots, but they learn very early that it's a numbers game.
To quote an old hockey legend, "You miss 100% of the shots you don't take".
Bracket, bracket, bracket.
Shoot, shoot, shoot.
You may never be back.
Make it count.
It's the composition, stupid!
You have a natural point of interest for your picture - literally.
Try moving the location of the waterfall around in your picture - top, bottom, left, right, center.
Play with the rule of thirds.
Rule of Thirds

This successful technique has been used by artists for hundreds of years.
Mentally divide the frame into thirds, both horizontally and vertically. It would look something like the grid shown here. The intersections are natural focal points. Placing the waterfall in one of these locations will give it an extra emphasis.
Remember, though, it's only a rule and rules are meant to be ....
If you have a zoom lens, use it to play with different compositions too - close-ups, wide angle, etc.
Experiment with vertical (aka portrait) and horizontal (aka landscape) compositions. Waterfall pictures are often perfect for vertical compositions so give it a try.
Pay attention to any distracting elements in the frame such as trash or limbs. If you have an ugly sky try to remove it from the frame.
Playing with the viewpoint is well worth some time. Frontal shots of a waterfall are often - what shall I say - boring. Look for nice views from the side that use trees, foliage, or rocks to accent or frame the waterfall. Don't just stop at the most obvious spot and setup your tripod.
Again, we're talking about taking a bunch of pictures. Later you can look them over and figure out what works and what doesn't. Learning what works and what doesn't is an important part of training your eye to see both the possibilities and the problems.
Are you ready now? Psyched up?
Go take some waterfall pictures!
Waterfall-Picture-Guide › Waterfall Pictures
Like This Page?

New! Comments
Have your say about what you just read! Leave me a comment in the box below.